W123 300D – Shifter Bushings
A couple of weeks ago I was driving along and shifted1 from “L”, for low, to “S”, for slope i.e. no overdrive, when I found that I couldn’t get into “S”, though I was able to get “D”, for drive. This really affected how the car drives and I knew that I would need to fix it quick!
I ordered two bushings for the shifter mechanism, Mercedes-Benz part number 115-267-12-50, and the installation went as follows.
Before getting started put on the handbrake and/or chock the wheels, you will likely need to take the car out of park.
Firstly you’ll need to remove your centre console, be patient with this there are no fastenings and the wood is very old by now. If you don’t know how to do it then watch this video, Kent explains it very well as always.
Now that you have the centre console out, you should use a small flat hear screwdriver to pop out the plastic bulb holder that illumates the gears through the cover plate. After that you can remove the shifter cover plate, to do this remove the 3 10mm hex screws, holes circled in purple below.
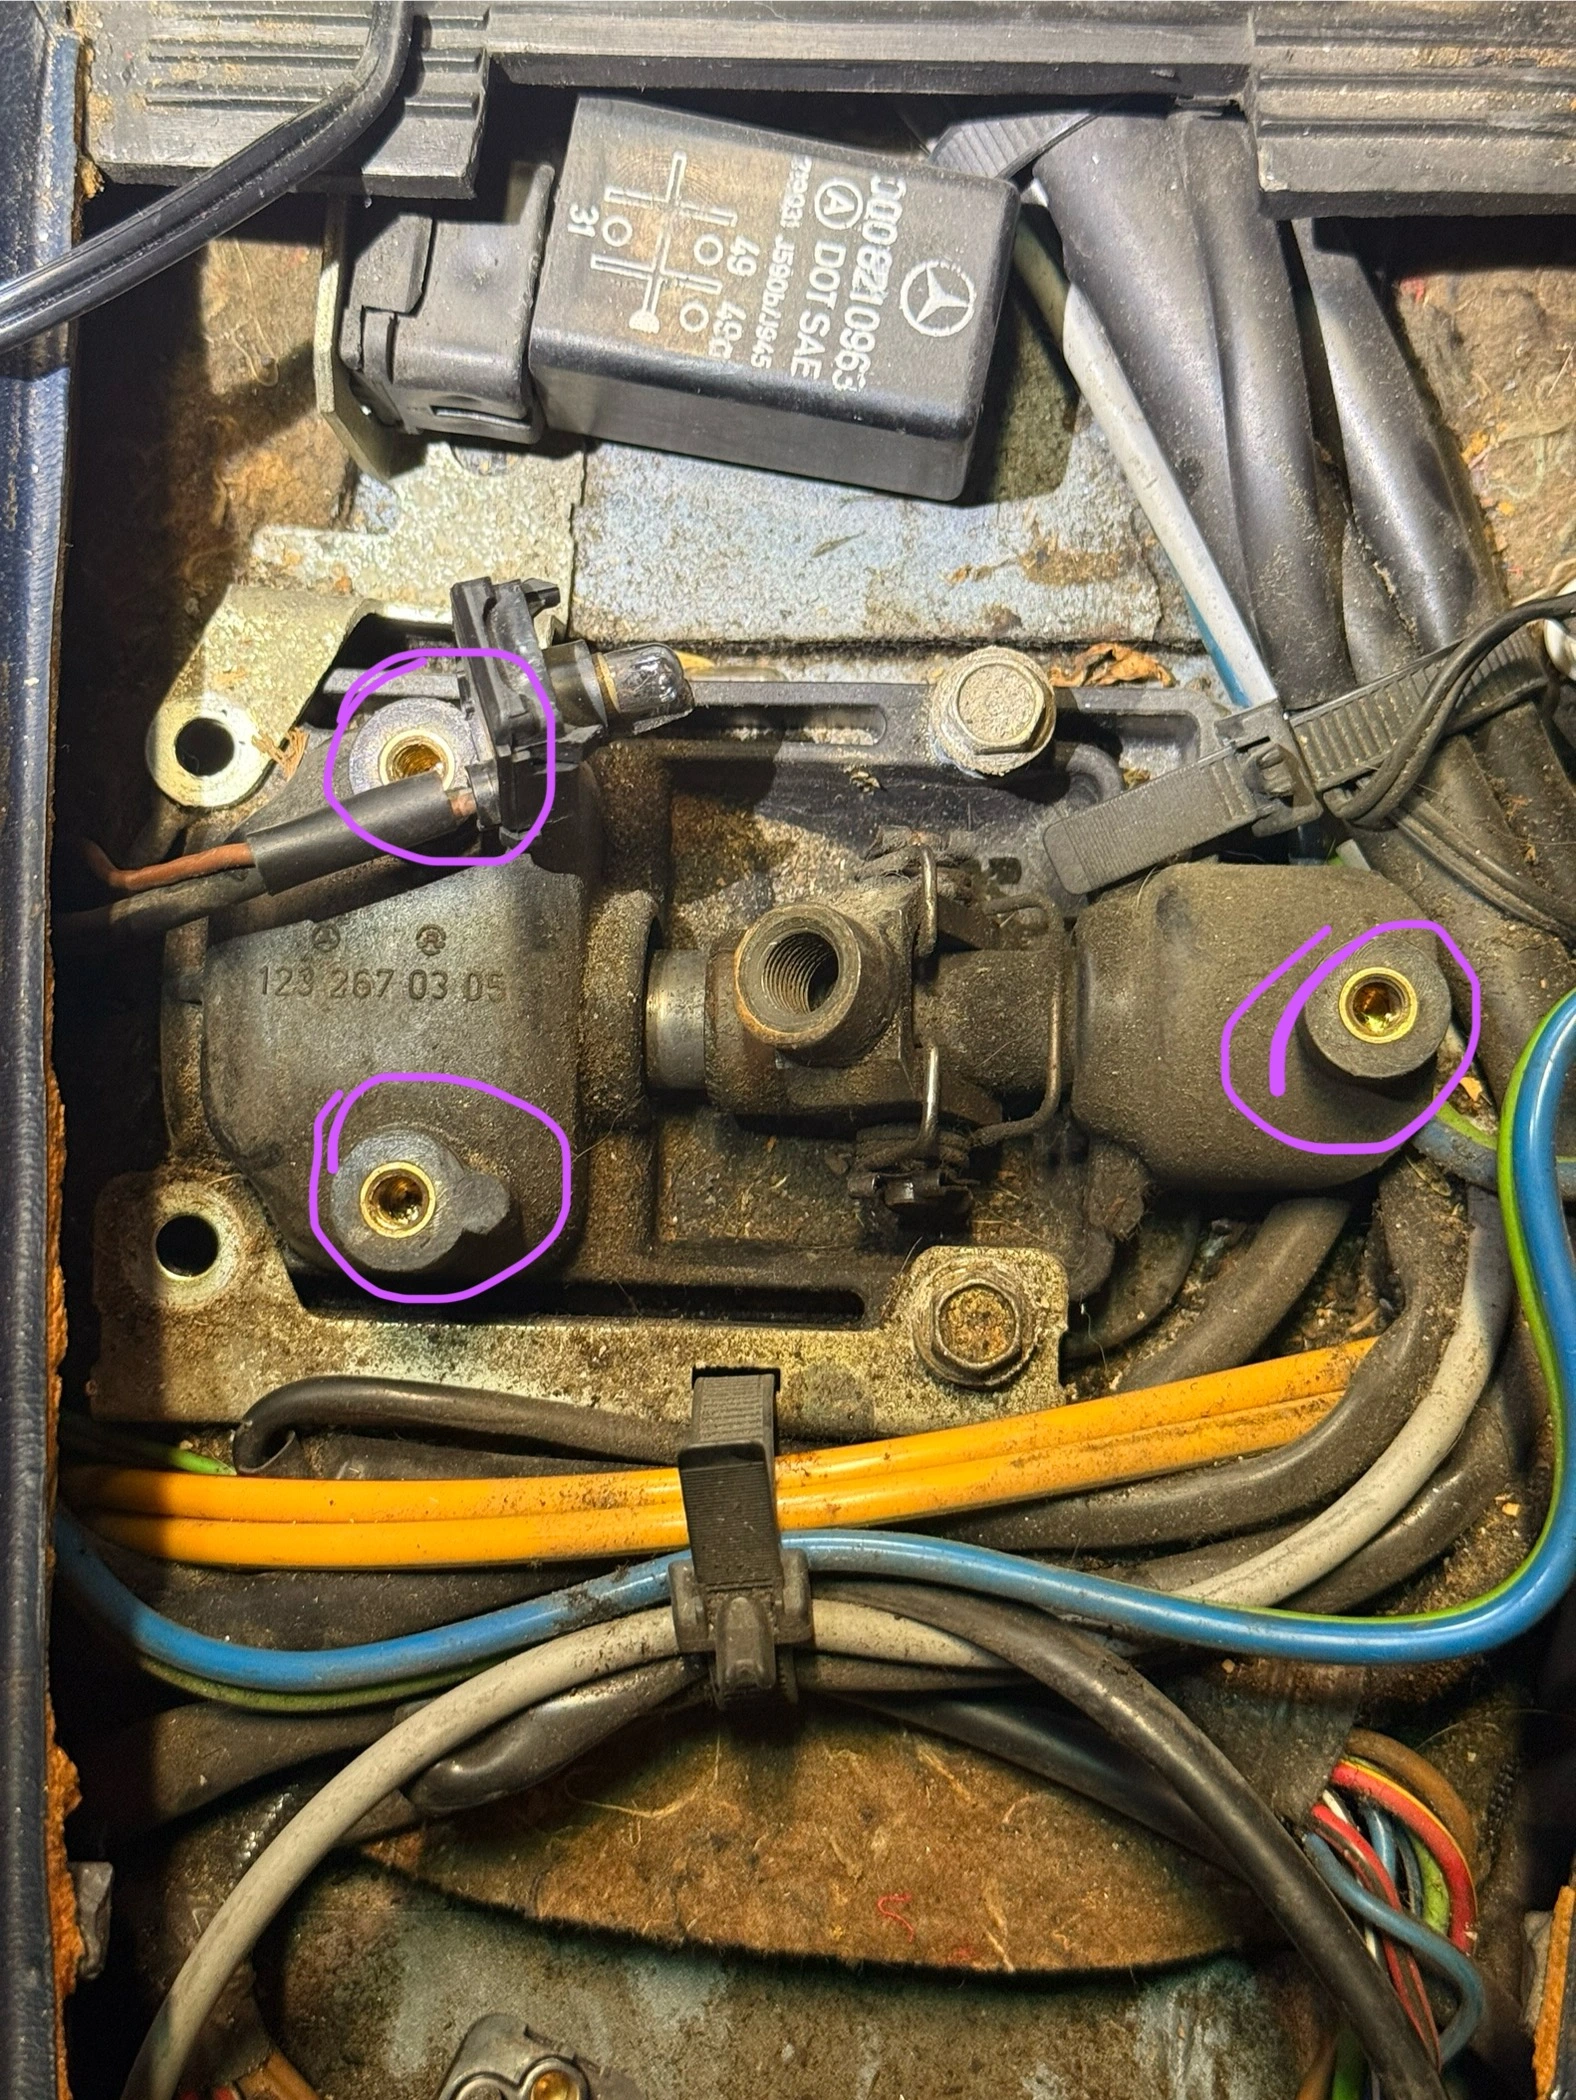
3 10mm hex screws.
Next up you will lift the cover plate and pull up the rubber boot (remember it’s 40+ years old). Under the boot you will find a 15mm nut on the shaft of the shifter, break that loose and then twist the shifter off.
Now you can take out the four 10mm hex head screws marked in blue below, these are tight they are loctited in place and go through the body of the car – so do not strip them out, go slowly.
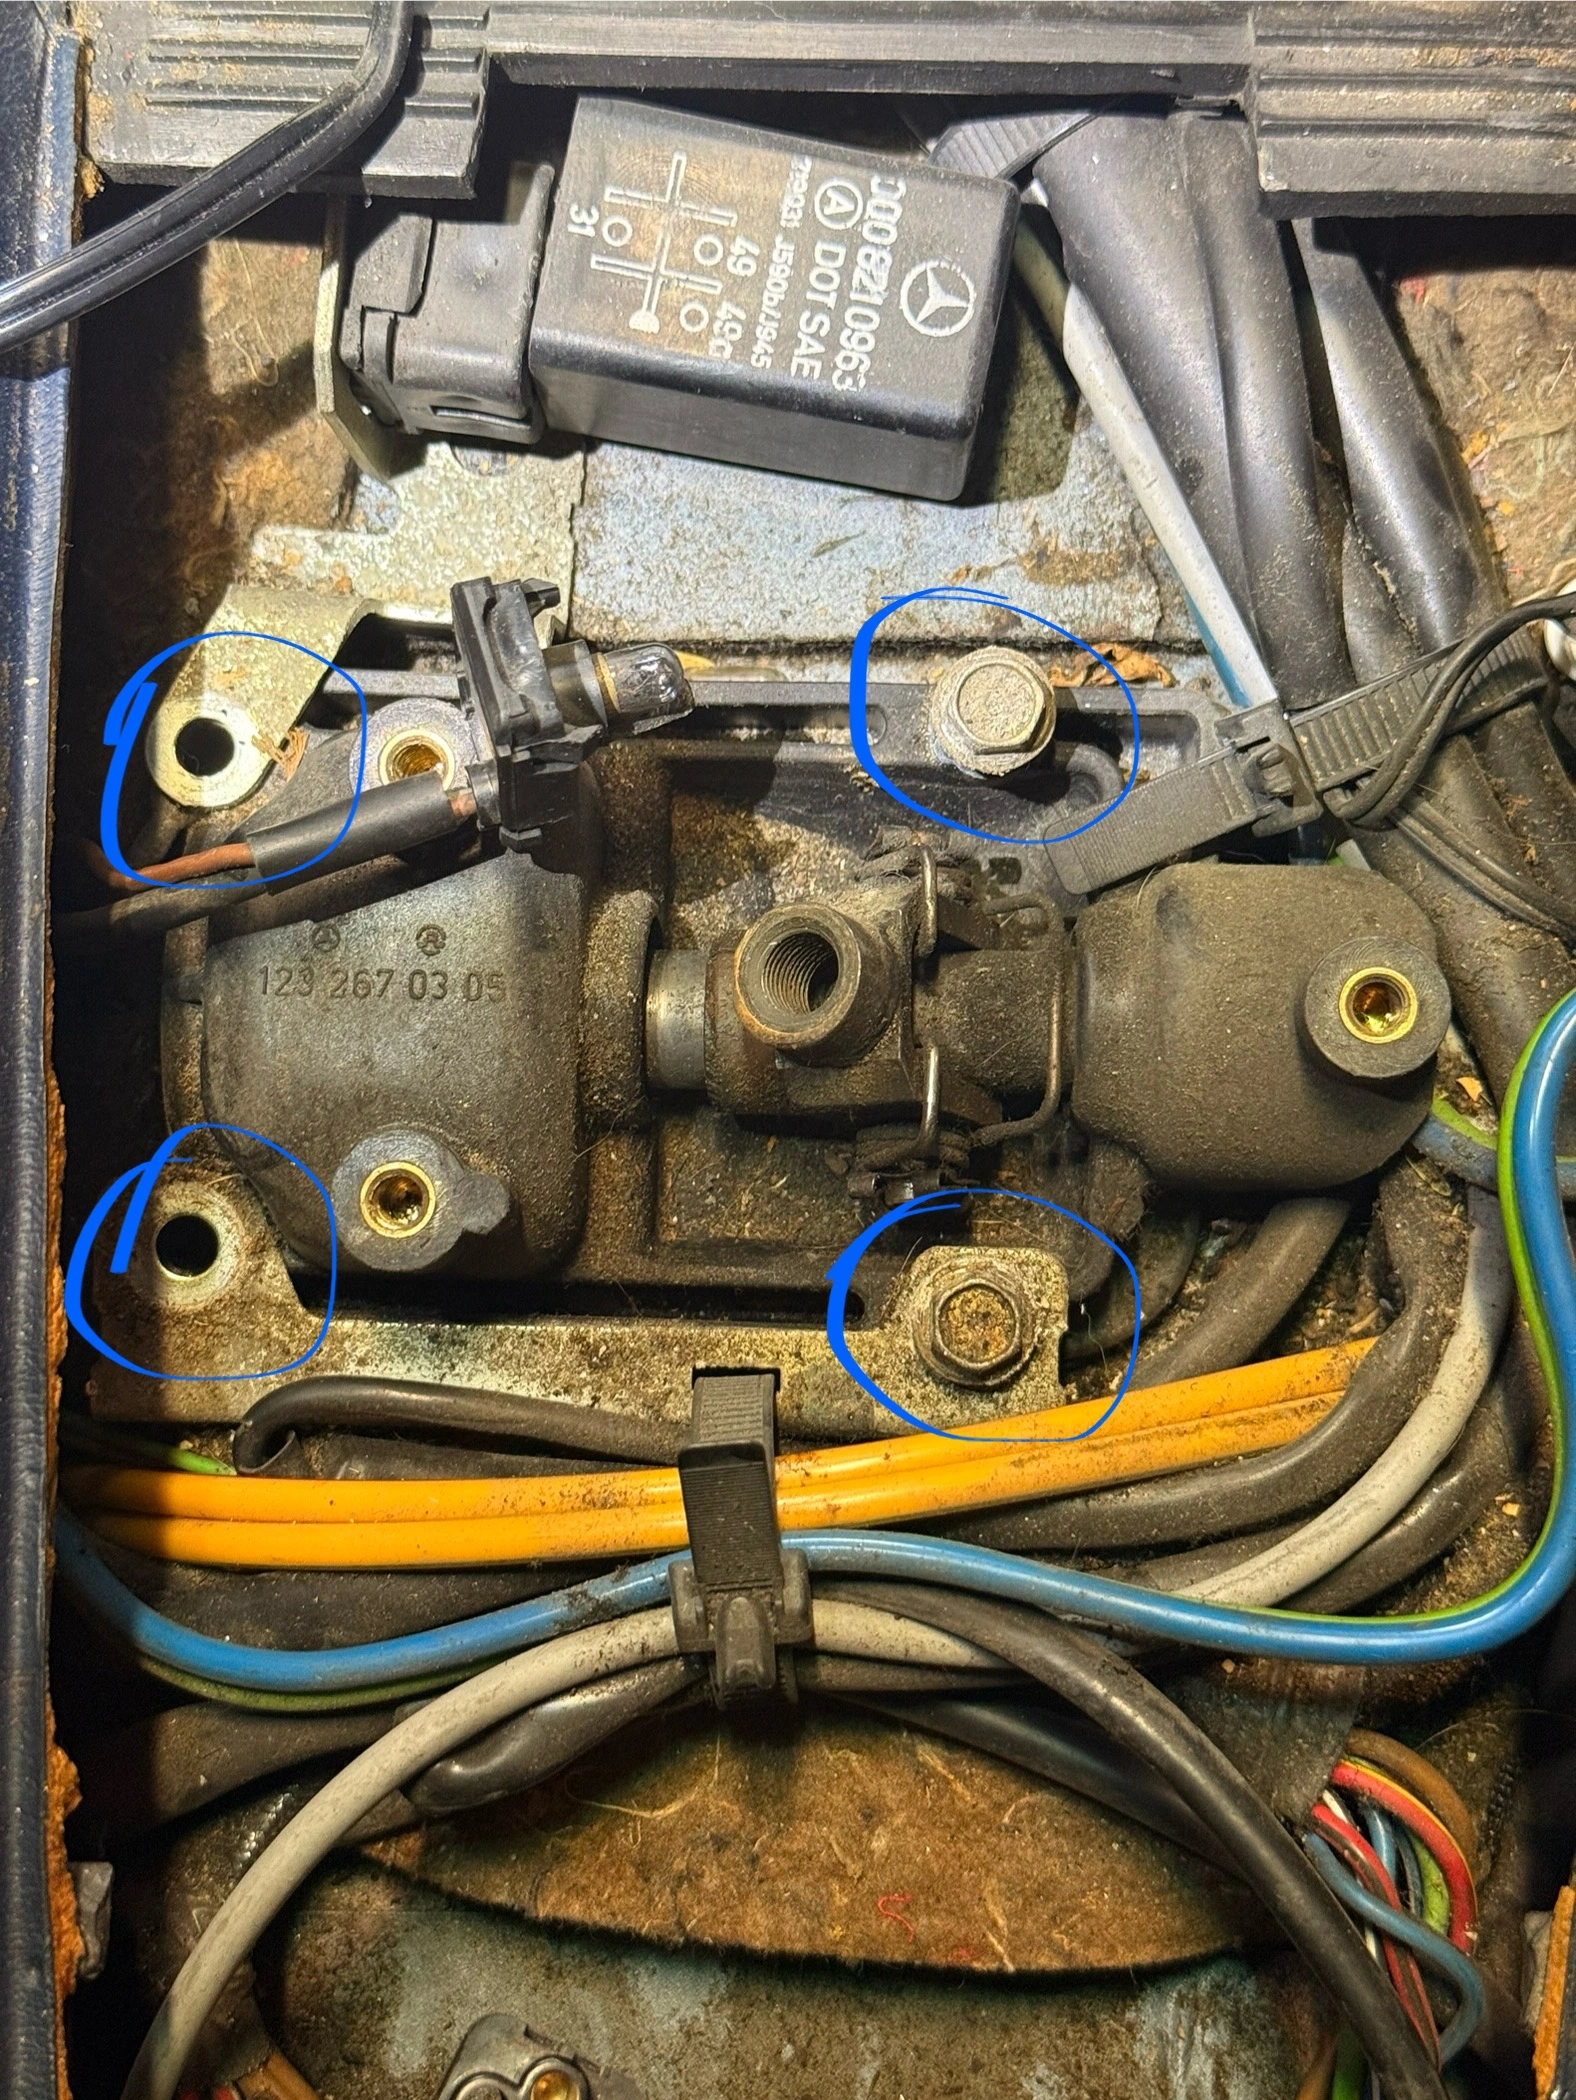
4 through body 10mm hex screws. Also note the ground strap on the top left screw (brown wire).
Next up you’ll take off the cable tie (circled in green below), I was able to open mine and reuse it, but cutting it is always an option. Then remove the clips (red arrows below) on the pin holding the unversal joint onto the shaft. Following this the pin should slide out it may be stiff from lack of lubrication. In the photo below you can actually see one of the old bushings has slid out of place and along the shaft … no wonder I was having problems.
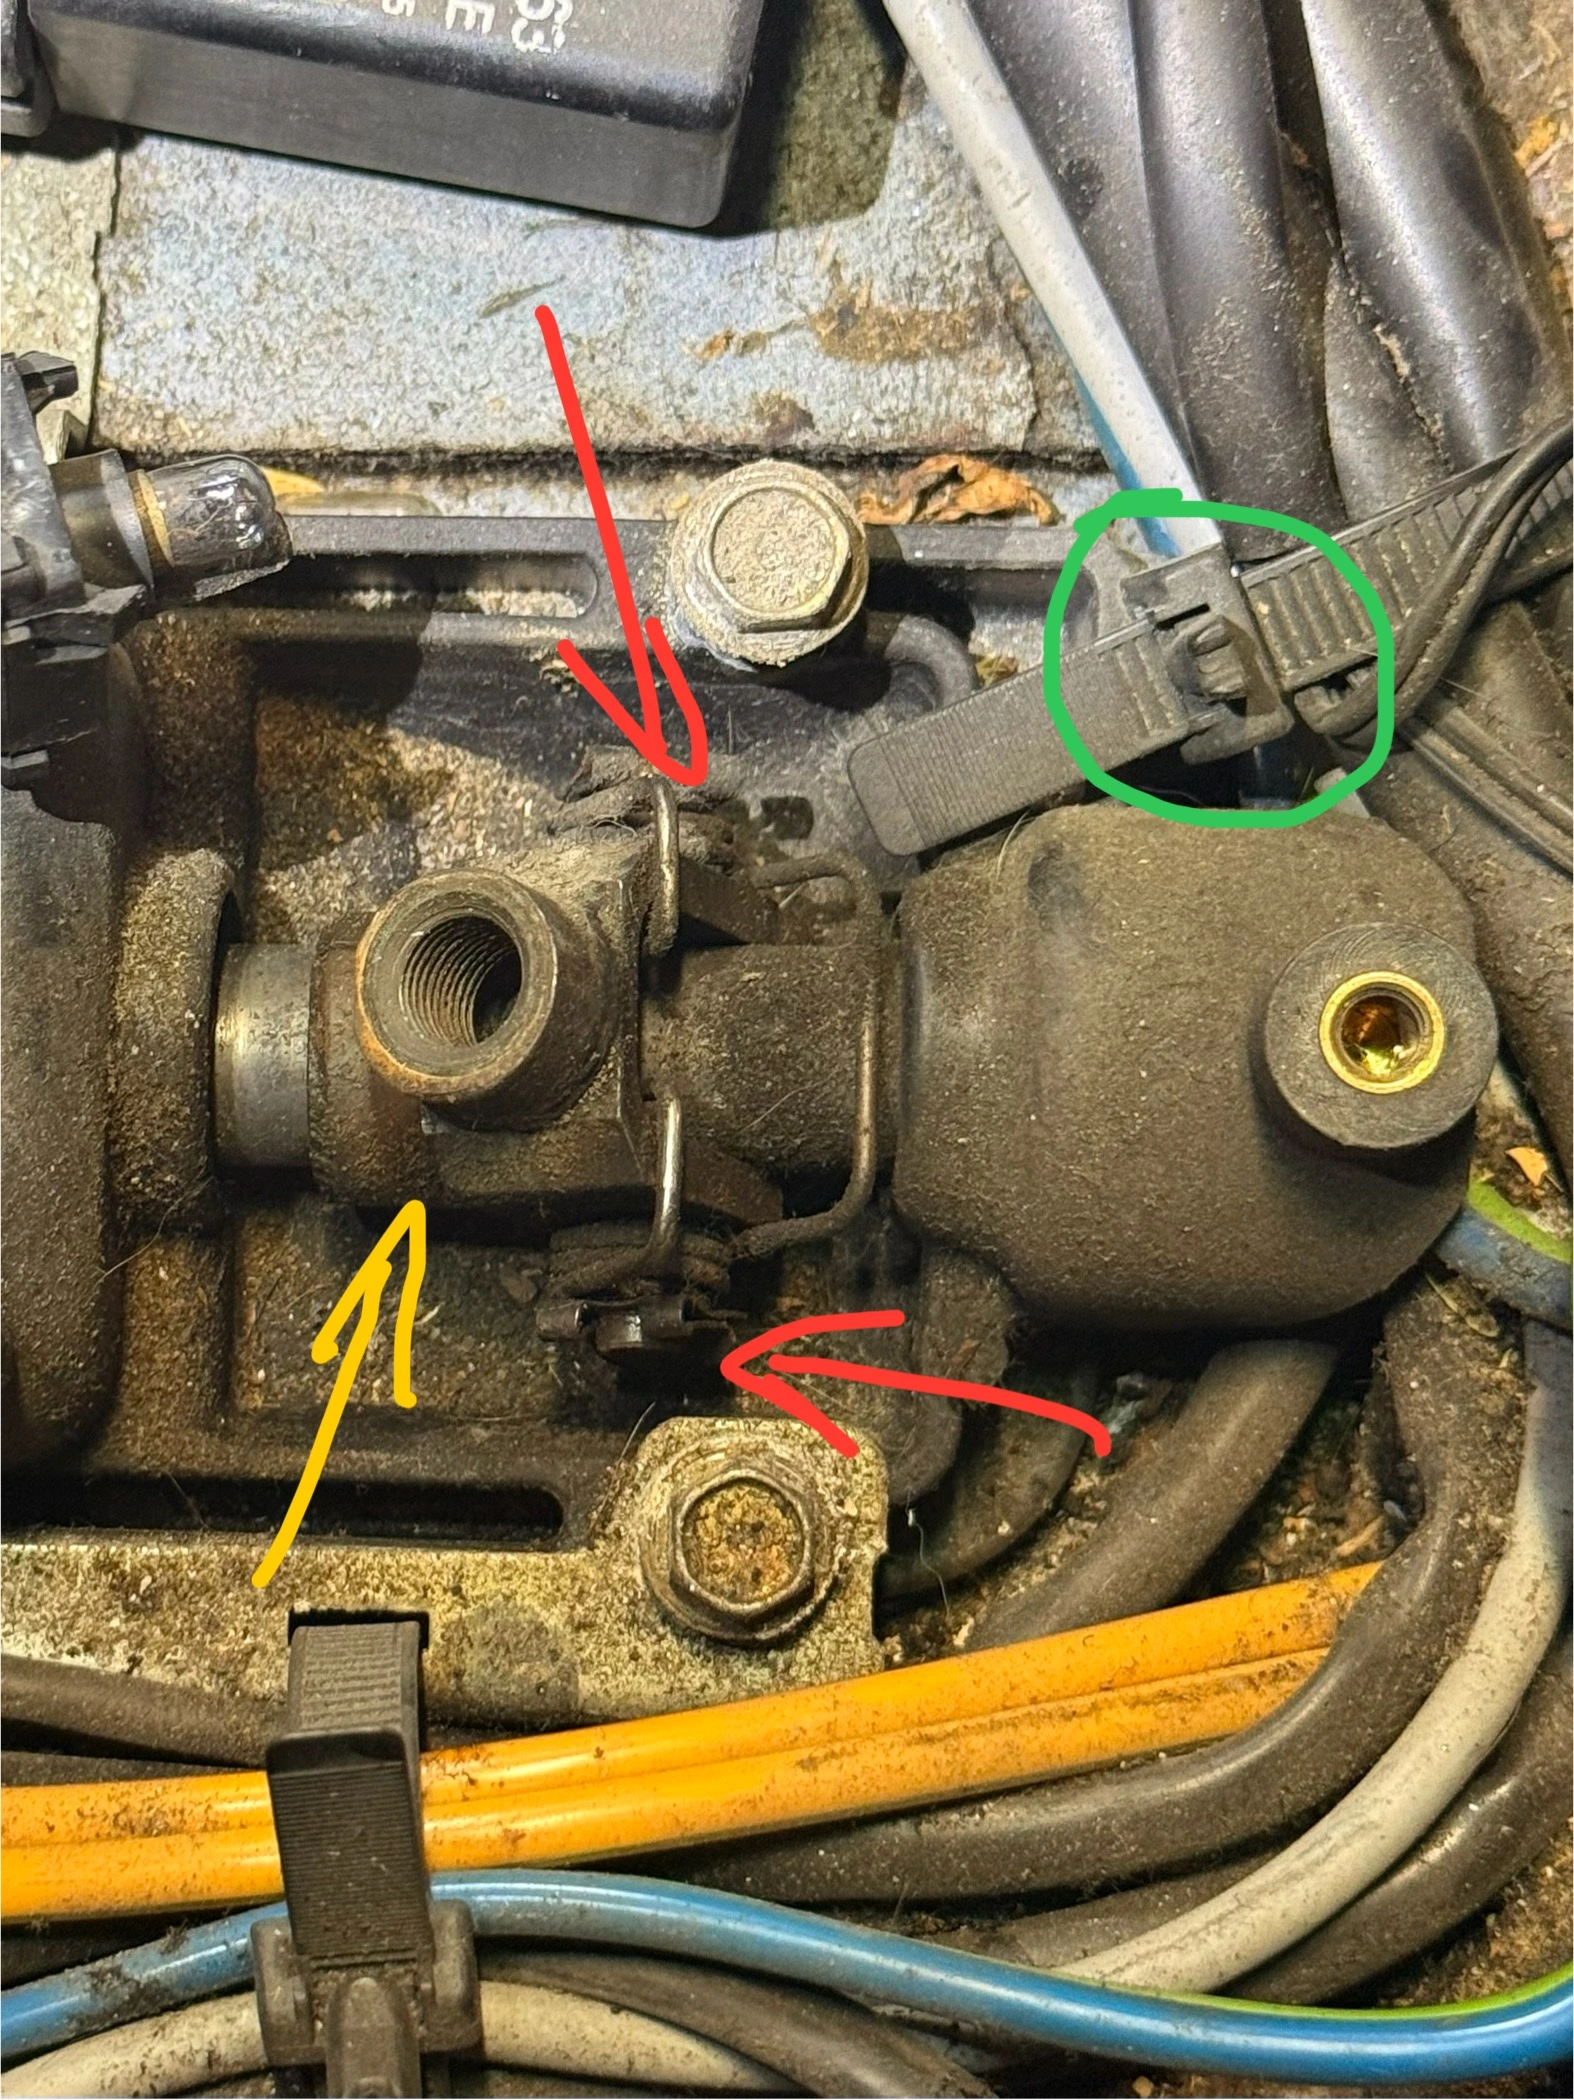
Can you see the old bushing?
At this point you should be able to lift the black plastic plate that the shaft runs through. On the right hand side of the plate there will be an external circlip retaining the shaft, my car also had 2 washer shims. On the left hand side there is a piece of plastic that you will need to pull out inorder to slide the shaft out. The shaft is connected to a lever which runs forward to the transmission under the car, try not to drop the shaft into the hole in the floor.
Putting in the new bushings is easy enough, put a dab of CV grease or wheel bearing grease on them inside and out. I put a drop of Lucas 75W-90 in the universal joint pin. Reassembly is quick and easy, now my shifts are tight.
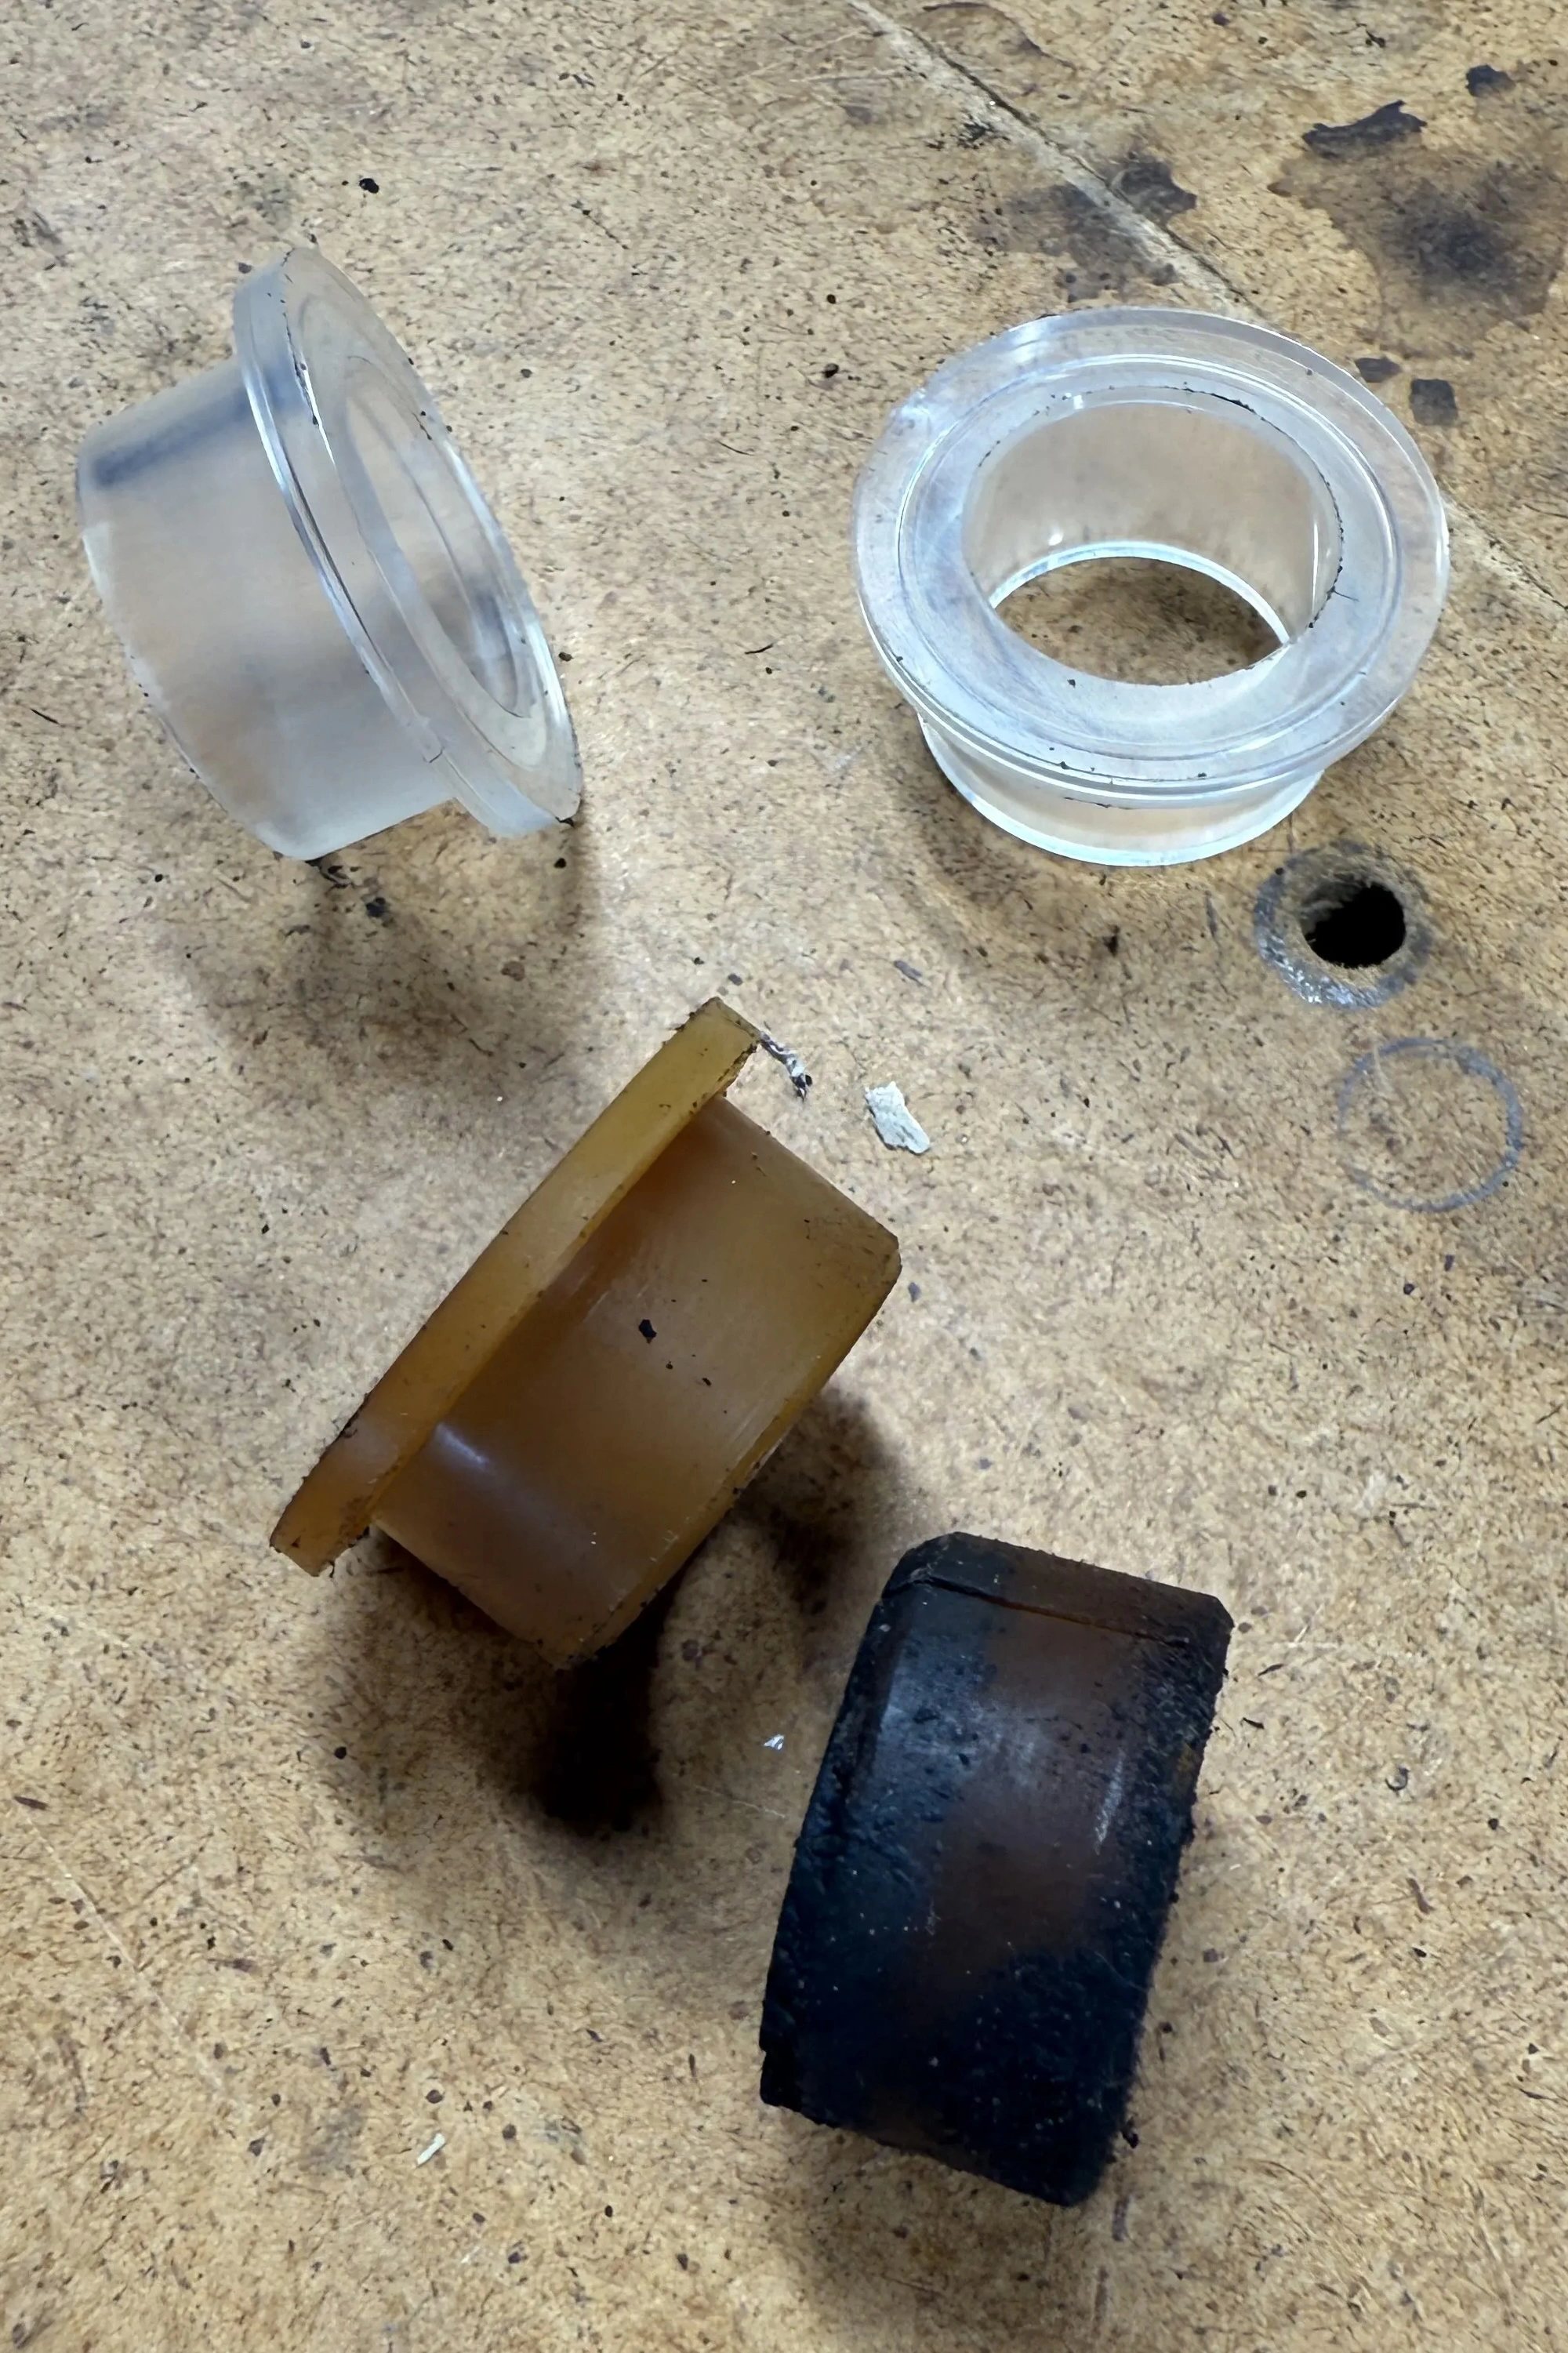
You can see the two new bushings verus the old set.
You can see the two new bushings verus the old set, the rougher looking one was on the side that was exposed to the outside i.e. temperature variations, oil & grease splashing up from the road. The shoulder on the rough one is gone, probably dropped on the road when I made that fateful shift. I imagine that the bushing fatigued from years of heat cycling but also not being lubricated, eventually it stuck to the shaft and the shoulder sheared off when I shifted – these cars were build with regular oiling and greasing front of mind.
-
I do this because the car needs all the help that it can get to be in the power band and restricting what gear it is in helps with that immensely. ↩︎